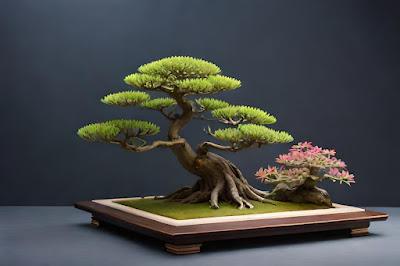
Bonsai trees are a beautiful way to add a touch of nature to your home or garden. With their intricate designs and unique shapes, they are a work of art in themselves. But have you ever considered creating a bonsai forest?
This is a technique where multiple bonsai trees are planted in the same container to create the illusion of a forest. It is a stunning and mesmerizing way to display your bonsai trees. In this article, we will discuss how to create your own bonsai forest and the secrets to making it truly mesmerizing.Table Of Contents (toc)
What is a Bonsai Forest?
A bonsai forest, also known as yose-ue, is a collection of bonsai trees that are planted together in a single container. The trees are carefully selected and arranged to create the illusion of a forest. The trees can be of different species, sizes, and ages, but they should all complement each other to create a harmonious and balanced composition.
How to Create Your Own Bonsai Forest
Creating a bonsai forest requires careful planning and preparation. Here are the steps to follow:
Step 1: Choose Your Trees
The first step in creating a bonsai forest is to choose the trees you want to use. You can use trees of different species, but they should all have similar requirements for light, water, and soil. It is also important to choose trees that have a similar style and shape so that they can be arranged in a harmonious way.
Step 2: Choose Your Container
The container you choose for your bonsai forest should be large enough to accommodate all of your trees. It should also be deep enough to allow the trees to develop a strong root system. You can use a shallow tray or a traditional bonsai pot, depending on the size and style of your trees.
Step 3: Plan Your Layout
Before you start planting your trees, it is important to plan your layout. Consider the size and shape of each tree and how they will fit together in the container. You can use different levels and angles to create depth and interest.
Step 4: Plant Your Trees
Once you have planned your layout, you can start planting your trees. Begin by adding a layer of soil to the bottom of the container. Then, place your trees in the container, arranging them according to your layout plan. Be sure to pack the soil tightly around the roots to ensure good contact.
Step 5: Prune and Shape Your Trees
Once your trees are planted, you can start shaping and pruning them to create the desired effect. You can use wire to shape the branches and create interesting shapes. Be sure to prune your trees regularly to keep them looking their best.
Tips for Creating a Bonsai Forest
Creating a bonsai forest is an art form that requires patience and skill. Here are some tips to help you create a truly mesmerizing bonsai forest:
Tip 1: Use Trees of Different Ages
Using trees of different ages can add depth and interest to your bonsai forest. You can use younger trees for the foreground and older trees for the background to create the illusion of depth.
Tip 2: Vary the Heights of Your Trees
Varying the heights of your trees can also create depth and interest. You can use taller trees for the background and shorter trees for the foreground to create the illusion of perspective.
Tip 3: Create a Focal Point
Creating a focal point can add interest and draw the eye to a specific area of your bonsai forest. You can use a larger or more interesting tree as your focal point.


